UPS API onboarding process
Dear customer,
Thank you for using the UPS API. We are happy to have you on board. Please follow the steps below to get started.
Currently implemented UPS API Subversion: v2403
Enter your UPS credentials
Our connections use your UPS ClientId and ClientSecret to authenticate with the UPS API. We store your credentials encrypted, even our support staff cannot retrieve the actual values.
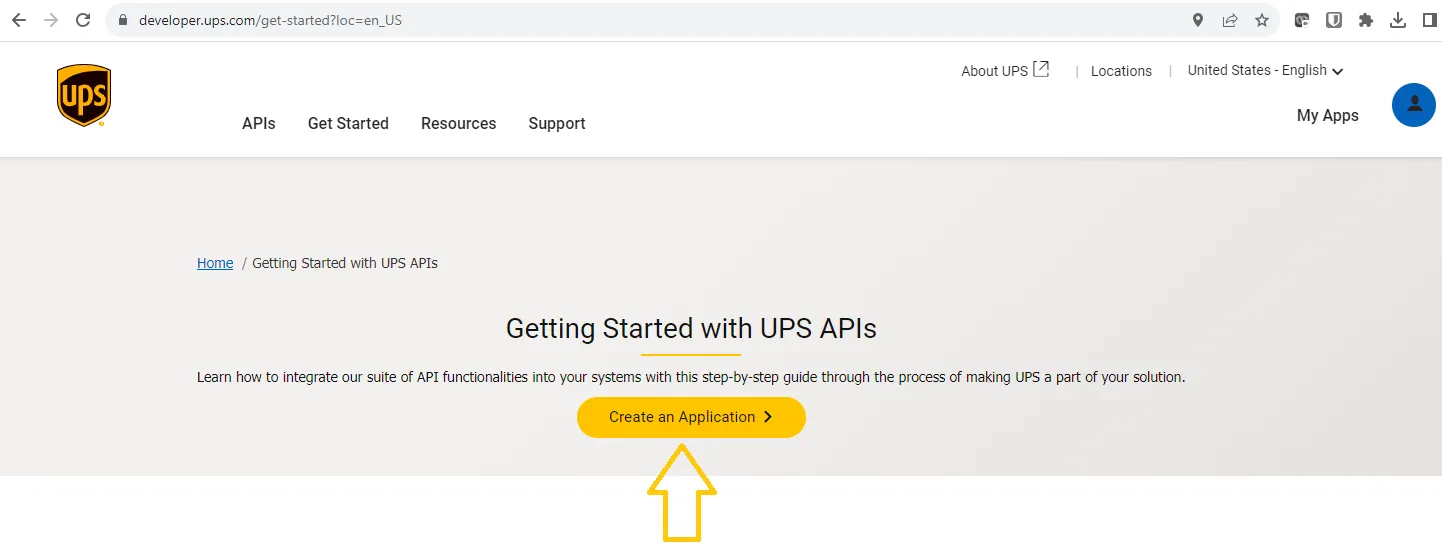
- Login to https://developer.ups.com/get-started
- If you don’t have an account yet, click on “Sign up” and follow the instructions. Link your shipping account(s) to this account.
- Click on “Create an Application”
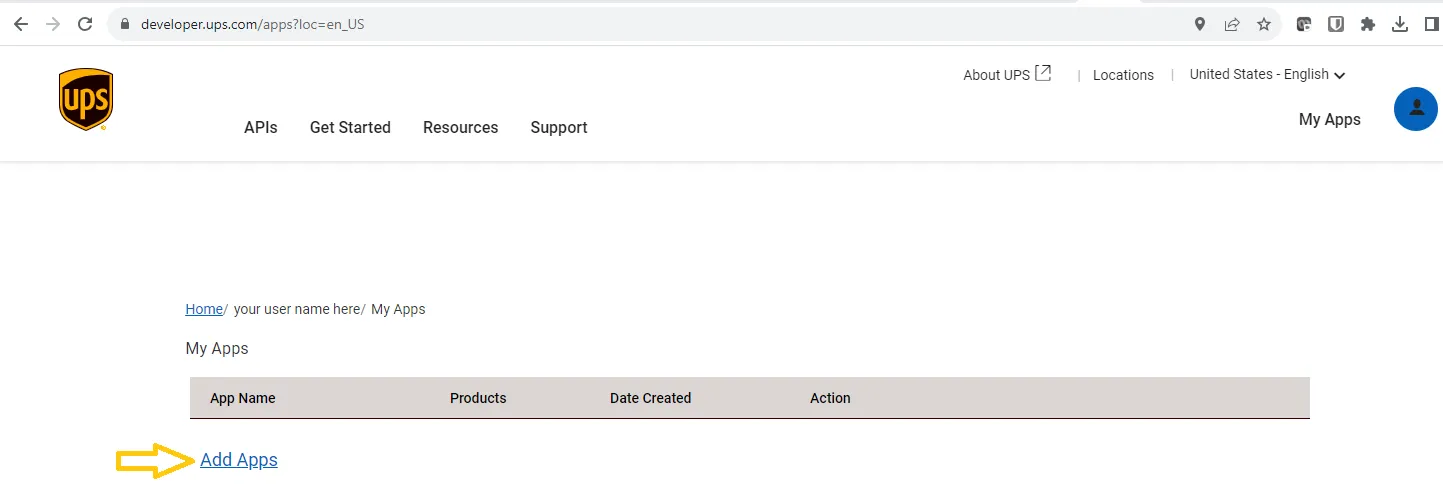
 3.Click on “Add Apps”
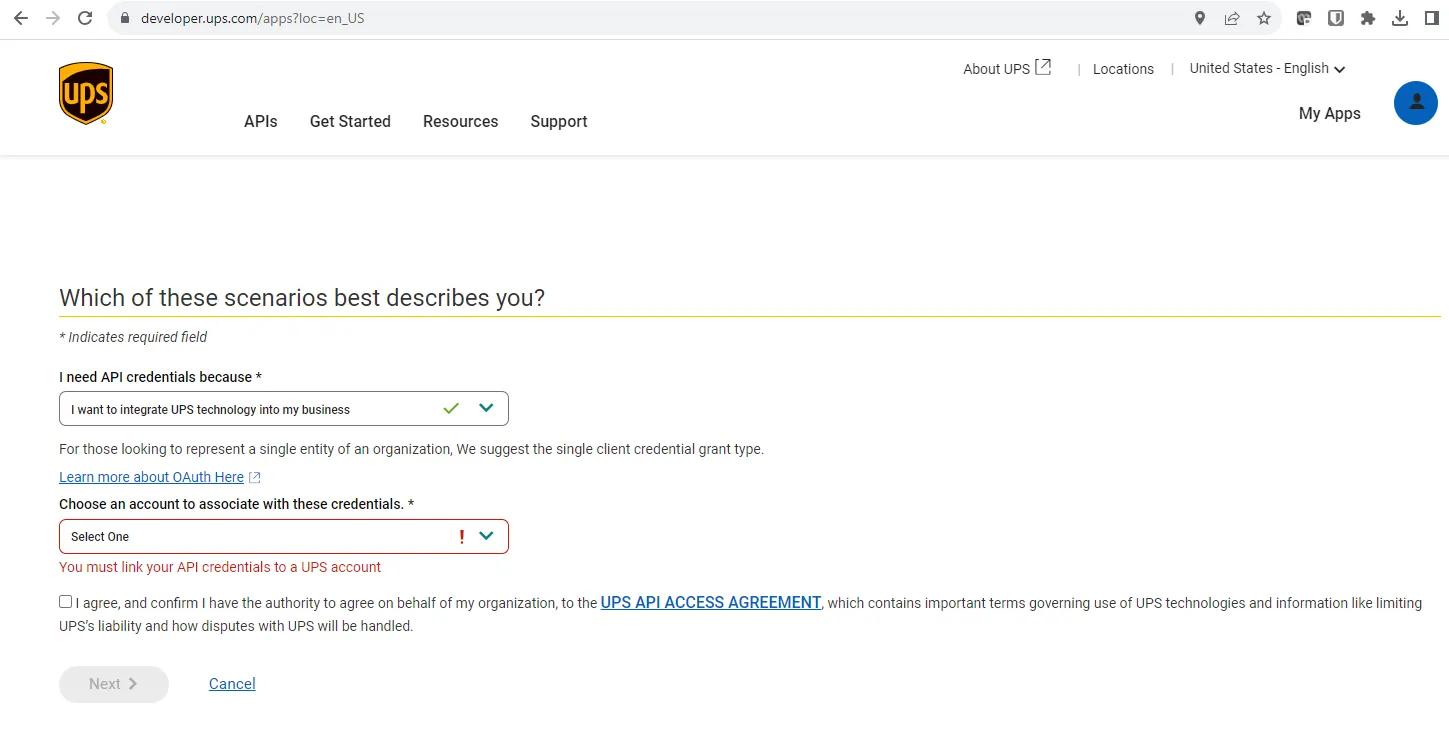
- Select:
- “I want to integrate UPS functionality into my business”
- Choose one of your accounts in the dropdown menu at “Choose an account to associate with these credentials”
- Check the “I agree, …” checkbox for the ‘UPS API ACCESS AGREEMENT’
- Enter:
- Your company details in
Primary Contact
- Your company details in
Make sure they are accurate, UPS has an automated verification process. If you do not pass it will mention something like “A non technical error occurred… ” You will then have to follow the instructions to log a ticket at UPS and resolve from there.
-
Viya.me informaton in the
API Integration Owner- First name:
Support team - Last name:
Viya.me - Email:
servicedesk@shipitsmarter.com - Function/Position/Title:
carrier integrations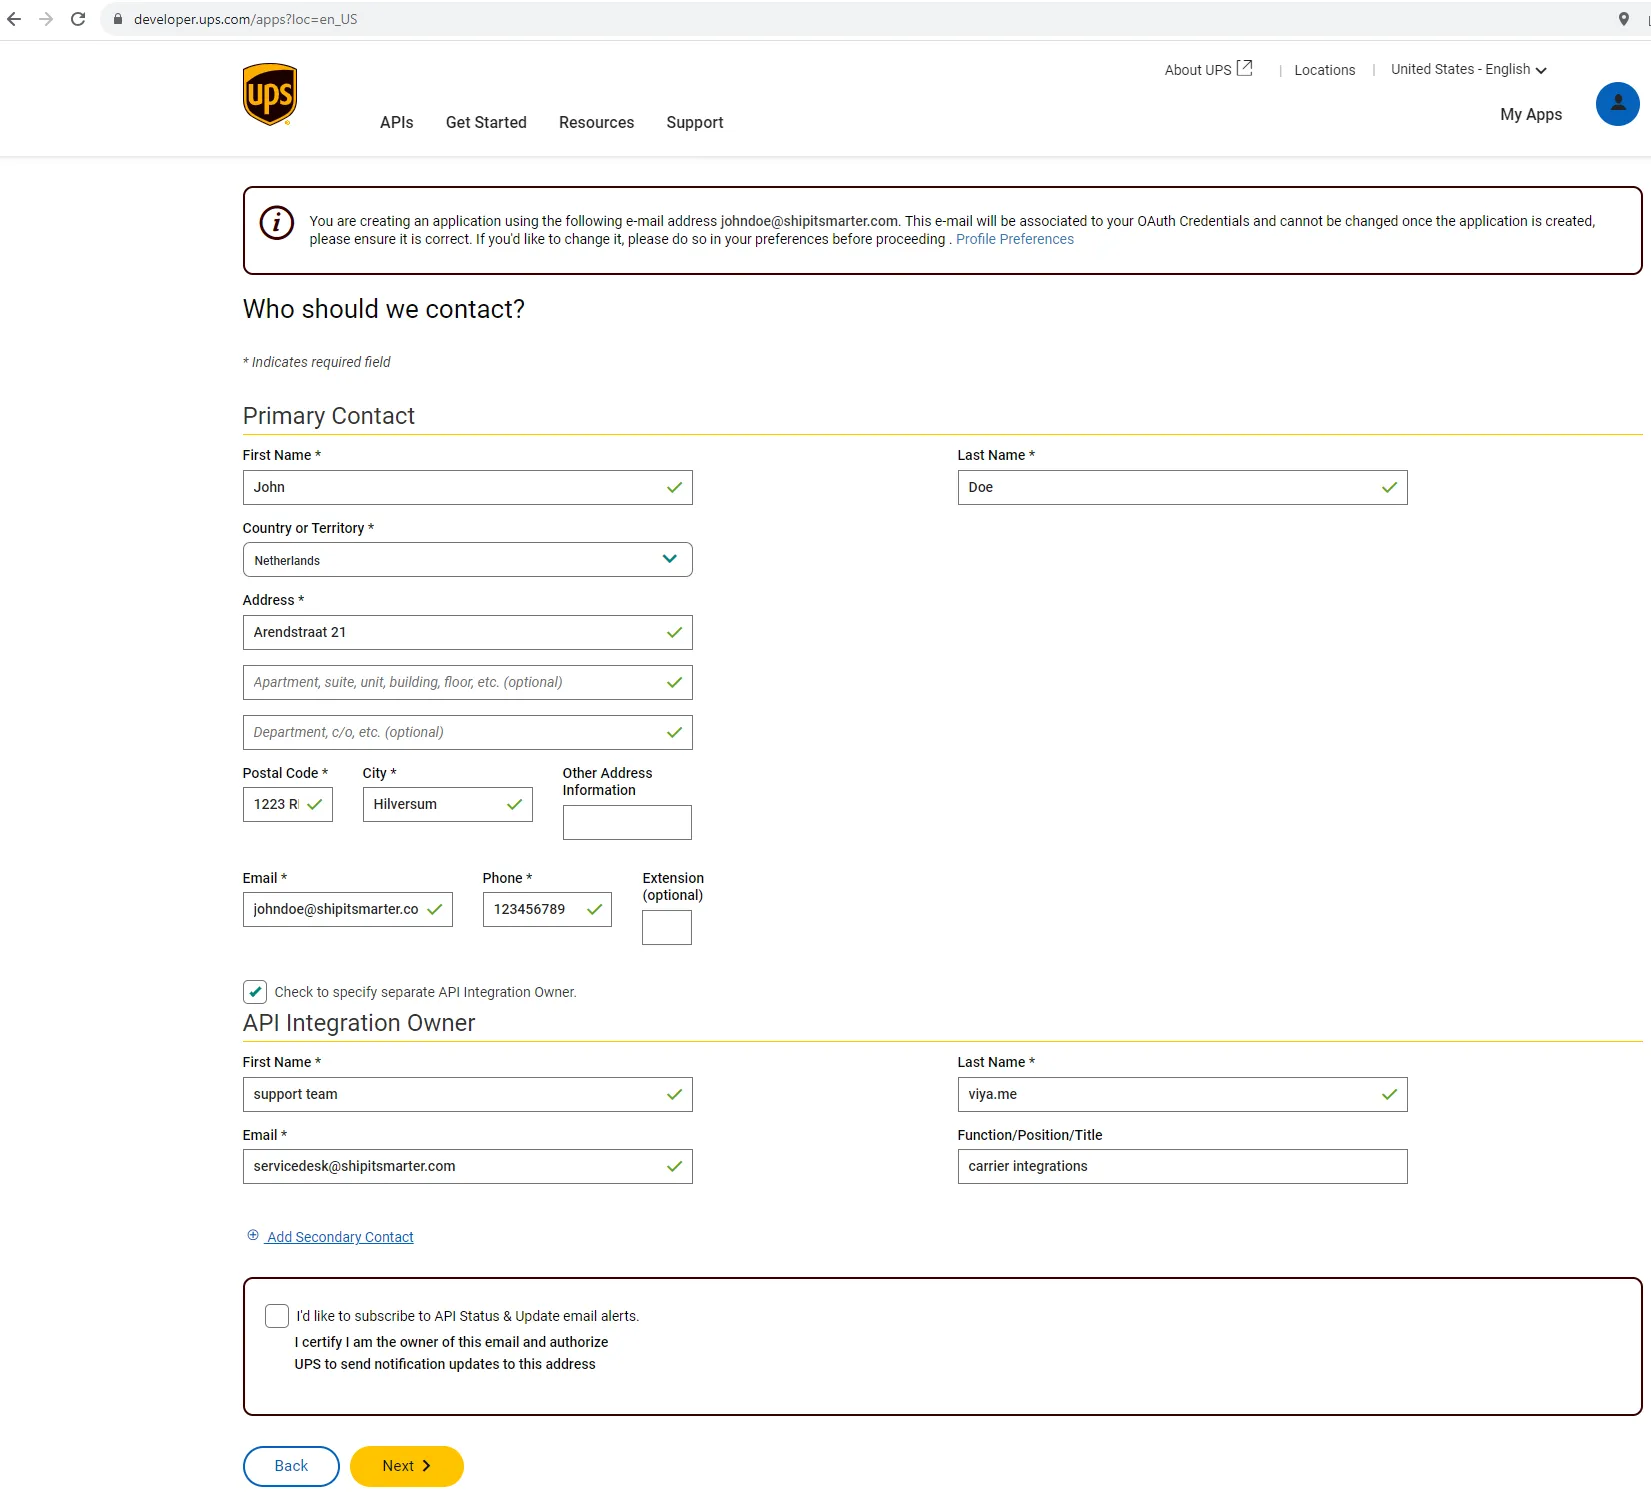
- First name:
-
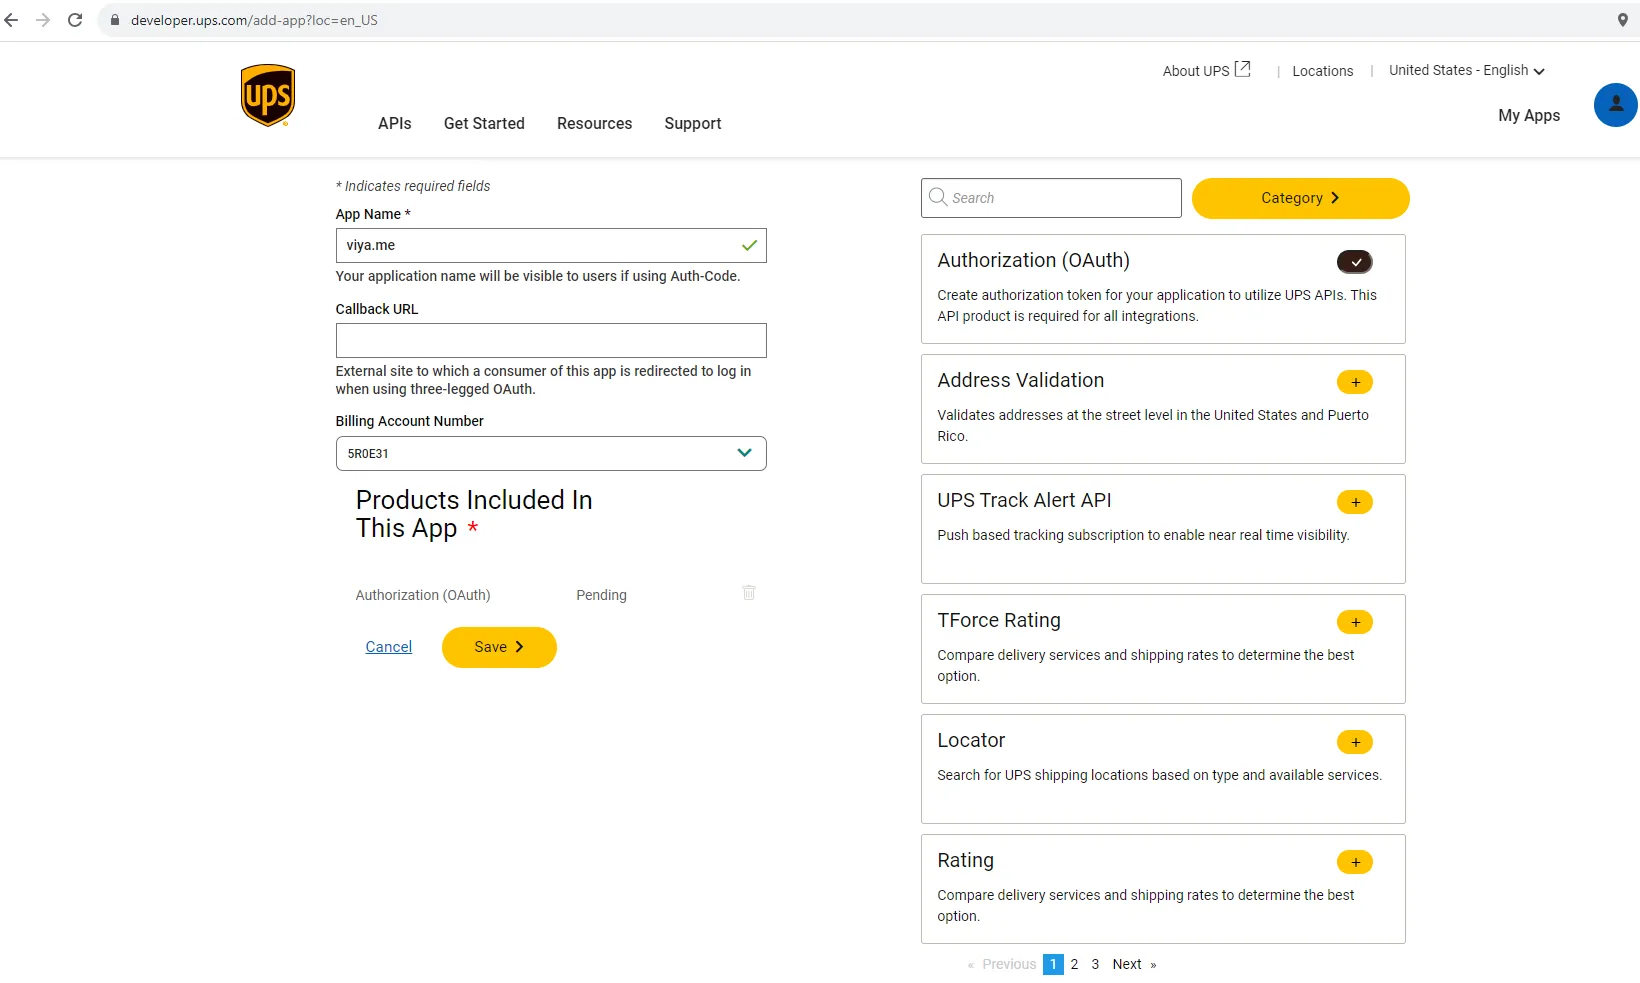
For the app enter:
-
App Name:
Viya.me -
Callback URL: leave empty or enter
https://auth.viya.me -
Billing Account Number: select the main account number also selected in first step
-
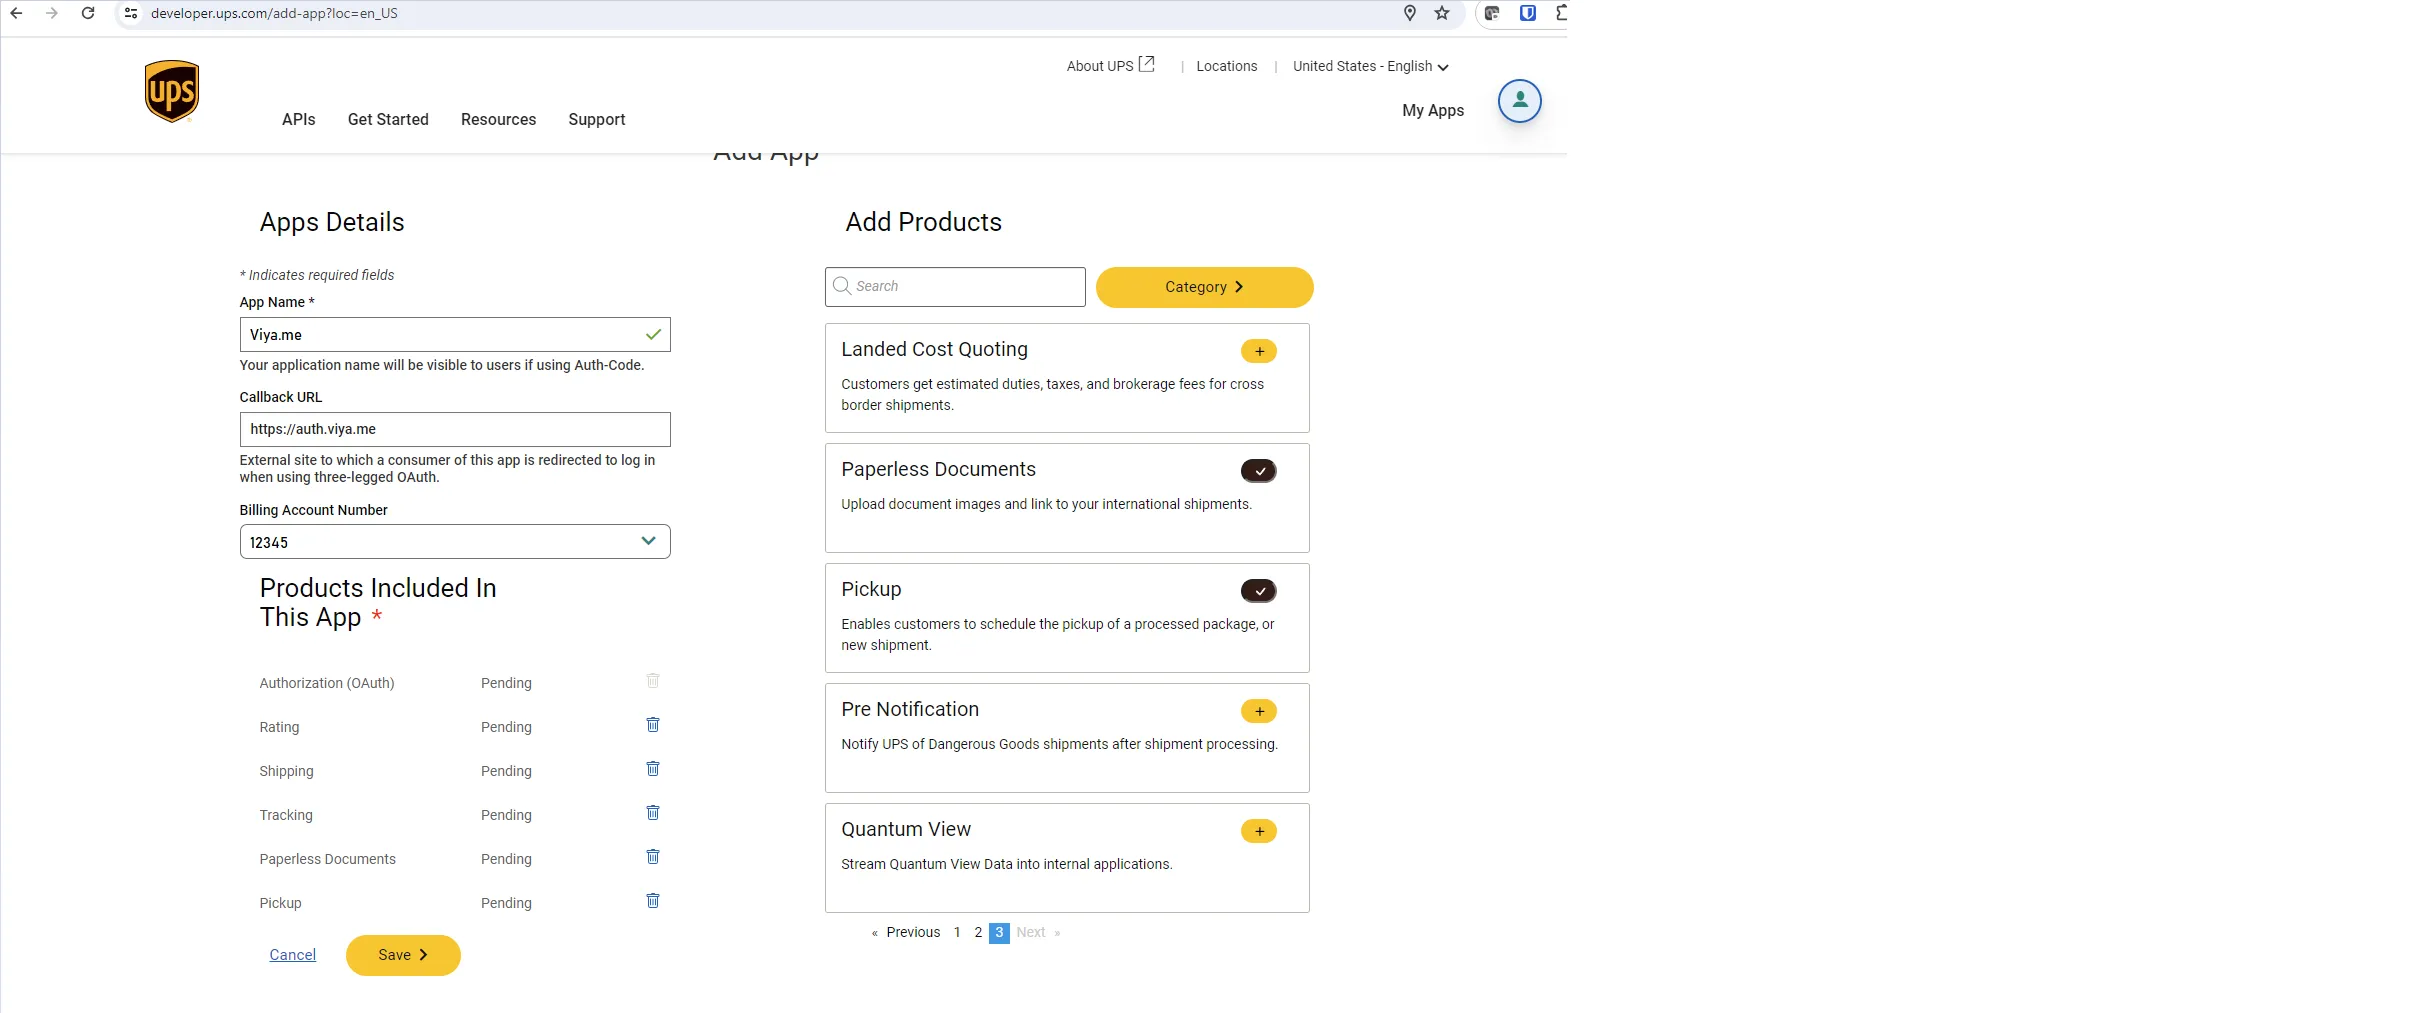
Add products:
- Authorization (OAuth) —> Already selected by UPS
- Locator
- Rating
- Shipping
- Tracking
- Paperless Documents
- Pickup
- Optional if shipping dangerous goods
- Dangerous Goods
- Pre Notification
-
Click on “Save”
-
-
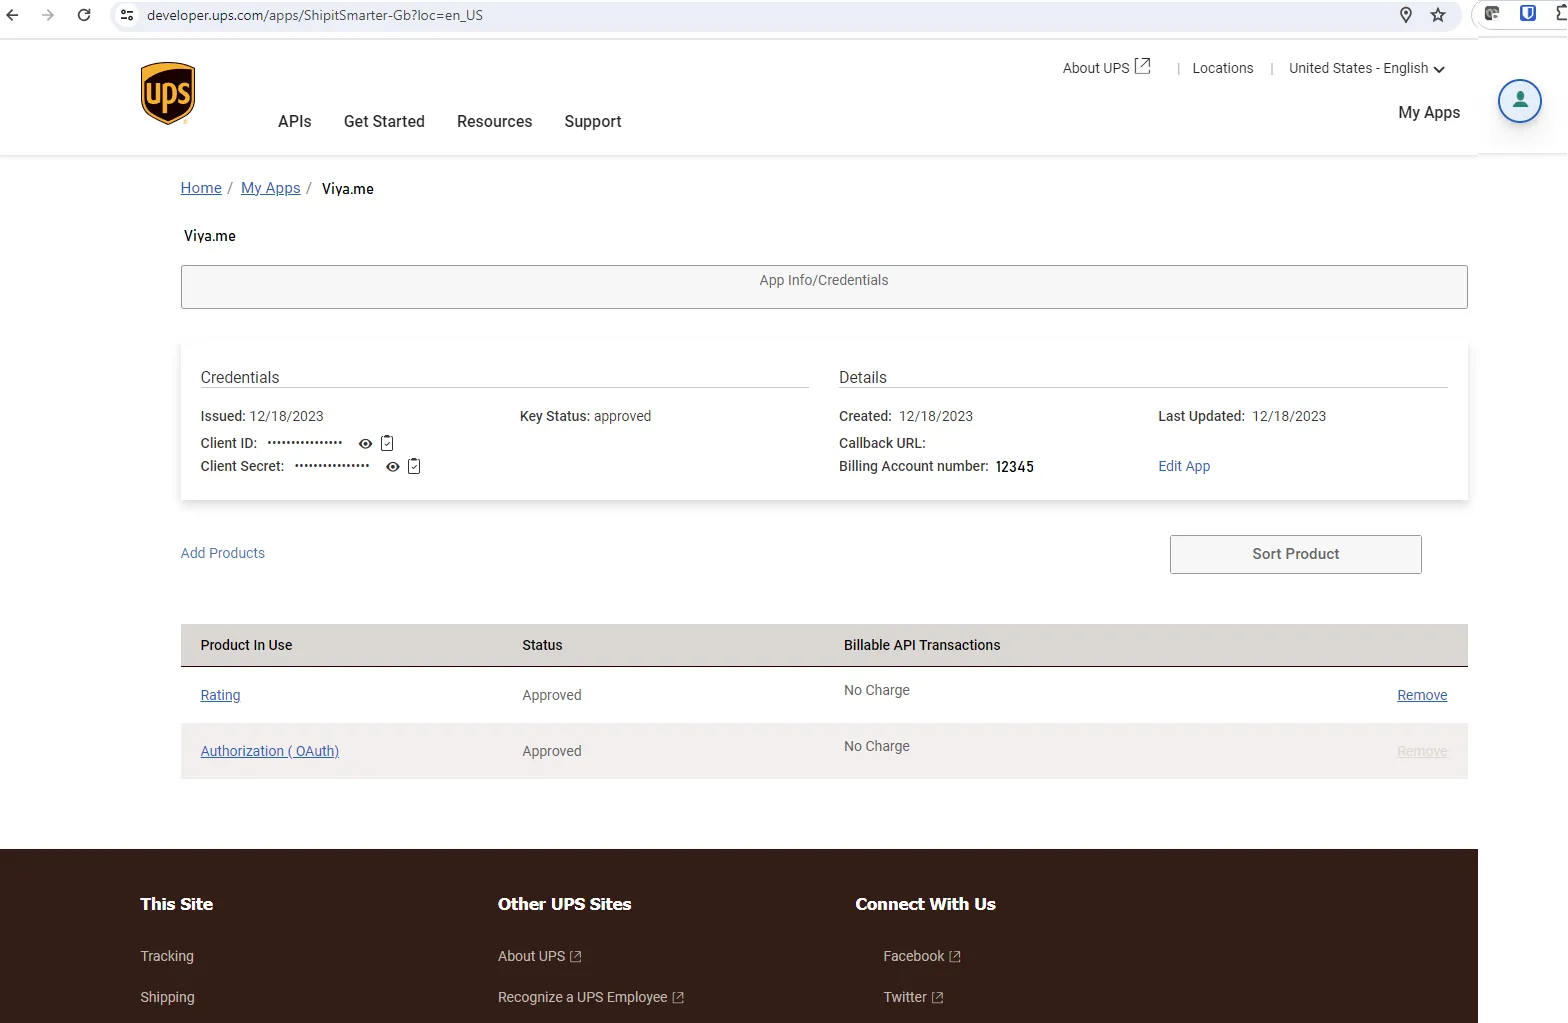
Take the credentials from the UPS page and enter them in the Viya.me portal:
- Go to the {mycompanyname}.Viya.me portal
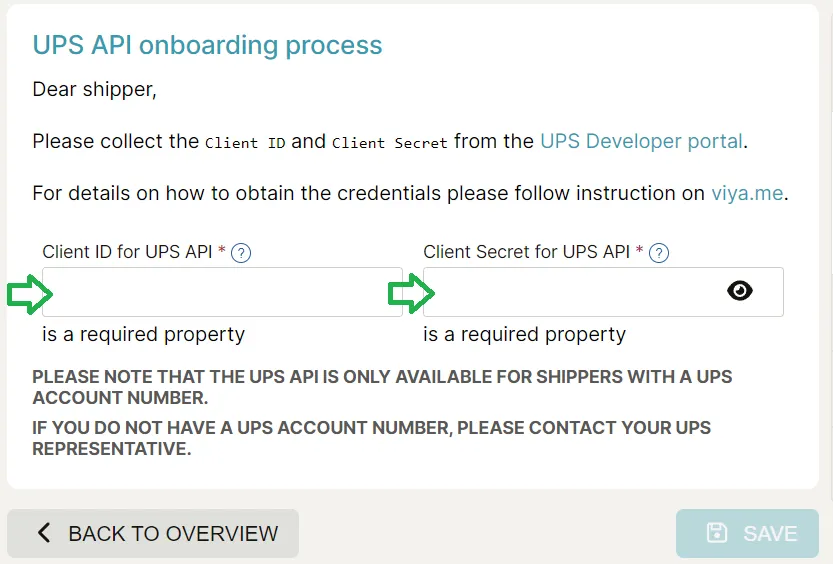
- Navigate to: Configuration > Carrier Configuration > UPS Express > tab: Onboarding
- Enter the credentials:
- Click on “Save”